 Talk On Call
 Chat On WhatsApp
How to Install LED Lights at Home (Step-by-Step Guide)
Are you looking to give your home a brilliant, energy-efficient makeover? You are in the right place! Lighting is the unsung hero of interior design. It sets the mood, highlights your favorite architectural features, and can completely transform the vibe of a room. If you are still relying on outdated incandescent bulbs or flickering fluorescent tubes, it is time for an upgrade.
Learning how to install LED lights at home might sound like a daunting task reserved for professional electricians, but with a little patience and the right guidance, it is actually a highly rewarding DIY project.
In this comprehensive, step-by-step guide, we are going to walk you through everything you need to know about installing LED lights in your space. Plus, we will highlight some top-tier fixtures from Ankur Lighting—a brand synonymous with modern aesthetics and cutting-edge illumination—to help you choose the perfect lights for your project.
Grab your toolkit, and let’s get glowing!

Why Choose LED Lights for Your Home?
Before we dive into the "how-to," let’s quickly touch on the "why." Why is the whole world making the switch to LED (Light Emitting Diode) technology?
-
Unmatched Energy Efficiency: LED lights consume up to 80% less energy than traditional incandescent bulbs. This means significant savings on your monthly electricity bill without compromising on brightness.
-
Incredible Longevity: While an old-school bulb might burn out after 1,000 hours, high-quality LED lights can last anywhere from 25,000 to 50,000 hours. Install them once, and you won't have to think about them for years.
-
Versatility and Mood Setting: LEDs come in a massive variety of color temperatures—from warm, cozy yellows (2700K) to crisp, cool daylight whites (6000K). They can be dimmed, color-tuned, and seamlessly integrated into smart home automation systems.
-
Low Heat Emission: LEDs convert most of their energy into light, not heat. This makes them safer to touch and reduces the load on your home’s air conditioning during hot summer months.

Tools and Materials You Will Need
Preparation is the key to a smooth and safe installation. Before you touch a single wire, make sure you have the following tools gathered:
-
New LED Fixtures (We will share some top recommendations from Ankur Lighting below!)
-
Voltage Tester: Absolutely crucial for ensuring the power is completely off.
-
Wire Strippers & Cutters: To prepare the electrical wires for a secure connection.
-
Screwdriver Set: Both Phillips and flathead.
-
Wire Nuts / Wago Connectors: To safely cap and connect the electrical wires.
-
Electrical Tape: For added insulation and safety.
-
Sturdy Stepladder: To safely reach your ceiling or high wall points.
-
Drill and Drywall Saw (Optional): Only necessary if you are cutting new holes for recessed lighting.
Step 1: Plan Your Lighting Layout
A successful LED installation starts long before you pull out the wire strippers. You need to assess your space and plan a layered lighting strategy. Interior designers generally break lighting down into three categories:
-
Ambient Lighting: The primary source of light in a room (e.g., panel lights or downlights).
-
Task Lighting: Focused lighting for specific activities like reading, cooking, or working (e.g., adjustable spotlights).
-
Accent Lighting: Decorative lighting used to highlight artwork, architectural features, or create a specific mood (e.g., strip lights).
Map out where you want your lights to go and measure the dimensions carefully. If you are replacing existing fixtures, check the cutout diameter of your ceiling holes so you can purchase fixtures that fit perfectly.
Step 2: Choose the Right LED Lights for Your Space
Selecting the right fixture is half the battle. To guarantee longevity, anti-glare comfort, and premium aesthetics, we highly recommend exploring the catalog at Ankur Lighting. Here are 5 standout products from their collection that cater to different areas of your home:
1. For the Living Room or Home Office: ANKUR LANA RECESSED ADJUSTABLE LED DOWNLIGHT
If you want flexibility, this is your go-to fixture. The Ankur Lana is an adjustable recessed downlight that allows you to direct the beam exactly where you need it. It is perfect for home offices where you need task lighting over a desk, or in a living room to highlight a beautiful piece of wall art. Its compact design blends seamlessly into modern ceilings.
2. For Indirect Ambient Lighting: ANKUR HIGH POWERED LED STRIP LIGHT
LED strip lights are the ultimate secret weapon for modern interior design. Whether you are installing them under your kitchen cabinets, behind your TV for a cinematic backlight, or in a ceiling cove for a soft, luxurious glow, these high-powered strips offer incredible design freedom and continuous, spotless illumination.
3. For Eye Comfort and Focus: ANKUR EURO SLIM FIXED RECESSED ANTIGLARE LED DOWNLIGHT WITH HONEYCOMB
Glare can cause severe eye strain, especially if you work from home or spend a lot of time reading. This Euro Slim downlight features a built-in honeycomb louver that traps peripheral glare, providing exceptionally comfortable and focused light. It is an ideal choice for studies, reading nooks, and above dining tables.
4. For Kitchens and Hallways: ANKUR ECO LED SQUARE PANEL LIGHT
Panel lights are fantastic for areas that require bright, even, and wide-reaching illumination. The Ankur Eco Square Panel provides uniform light distribution, banishing dark corners and shadows. Its ultra-slim profile makes it perfect for low ceilings in kitchens, basements, or long hallways.
5. For Walk-in Closets and Vanity Areas: ANKUR AURA ROUND ACRYLIC DIFFUSER RECESS DOWNLIGHT
Want to feel like you are shopping in a high-end boutique inside your own closet? The Ankur Aura features an acrylic diffuser that softens the light output, eliminating harsh shadows and flattering the space. It is brilliant for areas where you get dressed or apply makeup.
Step 3: Turn Off the Power (Safety First!)
Now that you have your tools and your beautiful new Ankur Lighting fixtures, it is time to get to work. Never mess with electricity while it is live. 1. Head to your home’s main electrical panel (breaker box).
2. Locate the breaker switch that controls the room you are working in and flip it to the "OFF" position.
3. Return to the room and flip the wall switch to make sure the light doesn't turn on.
4. Crucial Step: Once you remove the old fixture to expose the wires, use your non-contact voltage tester. Hold it near the wires; if it beeps or lights up, the power is still on. Do not proceed until you are 100% sure the power is dead.
Step 4: Remove the Old Fixture
If you are replacing an existing light, you need to clear the runway.
-
Carefully unscrew the canopy or cover of the old light fixture.
-
You will see a junction box in the ceiling housing the electrical wires. Usually, they are connected with twist-on wire nuts.
-
Support the weight of the old fixture with one hand (or have a helper hold it) while you untwist the wire nuts.
-
Disconnect the wires: separate the black (live), white (neutral), and green/copper (ground) wires.
-
Remove the old mounting bracket if your new LED fixture comes with its own.
Step 5: Prepare the Wiring
Take a look at the wires coming out of your ceiling and the wires attached to your new LED light.
-
Use your wire strippers to expose about half an inch (1.2 cm) of bare copper on the ends of the ceiling wires if they are frayed or damaged.
-
Modern LED downlights (like the ones from Ankur Lighting) often come with a small driver or junction box attached. Open this driver box to access the connection terminals.
Understanding the Color Code (Standard):
-
Live/Hot: Usually Brown or Black.
-
Neutral: Usually Blue or White.
-
Earth/Ground: Usually Green, Yellow/Green, or bare copper.
Step 6: Connect and Mount the New LED Light
This is where the magic happens! Follow these connection steps:
-
Connect the Ground Wire: Connect the green/copper wire from the ceiling to the ground terminal on the fixture's driver. (Note: Some double-insulated LED lights do not require a ground wire).
-
Connect the Neutral Wire: Twist the ceiling's neutral wire together with the fixture's neutral wire. Secure tightly with a wire nut or snap it into a Wago connector. Give it a gentle tug to ensure it won't slip out.
-
Connect the Live Wire: Finally, connect the live wires together securely.
-
Tuck the Wires: Carefully push the connected wires and the driver box up into the ceiling hole.
Mounting the Fixture:
-
For Recessed Downlights: Most modern LED downlights feature spring-loaded clips on the sides. Simply pull the clips upward, push the fixture into the ceiling cutout, and release the clips. They will snap down securely against the drywall, holding the light flush against the ceiling.
-
For Surface Mounted or Panel Lights: Screw the provided mounting bracket into the ceiling junction box, connect your wires, and then attach the LED fixture to the bracket using the side screws.
-
For Strip Lights: Clean the surface area thoroughly. Peel the backing off the 3M adhesive tape on the back of the strip, press it firmly into place, and plug the adapter into the nearest designated outlet.
Step 7: Test Your Handiwork
Once the light is securely mounted and flush with the ceiling, step off the ladder and head back to your breaker box.
-
Flip the breaker switch back to the "ON" position.
-
Walk back to the room and hit the wall switch.
-
Bask in the brilliant, instant, flicker-free glow of your new LED installation!
If the light doesn't turn on, turn the breaker back off and double-check your wire connections. A loose neutral wire is often the culprit for a light that refuses to shine.

Pro Tips for a Flawless LED Installation
To ensure your home lighting looks professional and lasts a lifetime, keep these expert tips in mind:
-
Check Dimmer Compatibility: Not all LED lights are dimmable, and not all older wall dimmers work with modern LEDs. If you plan to dim your new lights, ensure the fixture explicitly states it is "Dimmable" and upgrade your wall switch to an LED-compatible dimmer to avoid annoying flickering or buzzing.
-
Mind the Heat: While LEDs run cool, their internal drivers still generate a small amount of heat. If you are installing recessed lights in an insulated ceiling, make sure the fixture is IC-Rated (Insulation Contact). This means it is safe to have insulation touching the housing without posing a fire hazard. Ankur Lighting's premium downlights feature excellent aluminum heat sinks to manage thermal energy efficiently.
-
Consistency is Key: Keep your color temperatures consistent within an open-concept space. Mixing a 3000K warm white downlight with a 6000K cool white panel light in the same room can make the space look disjointed and jarring.
Conclusion
Upgrading to LED lighting is one of the smartest, most cost-effective home improvements you can make. It dramatically enhances the visual appeal of your interior, significantly reduces your carbon footprint, and slices your energy bills down to size.
By following this step-by-step guide, installing LED lights at home can be a safe, straightforward, and deeply satisfying weekend DIY project. Whether you are adding a sleek aesthetic with the Ankur Eco Square Panel or creating a sophisticated focal point with the Ankur Lana Adjustable Downlight, investing in high-quality fixtures is the secret to illuminating your home with style and confidence.
Ready to transform your space? Take it one room at a time, prioritize safety, and enjoy the beautiful, brilliant results of your hard work!
Frequently Asked Questions (FAQs)
1. Do I need an electrician to install LED lights?
In many cases, no. If you are simply replacing an existing fixture with a new LED light and there is already wiring in place, it is a straightforward DIY job. However, if you are running new wires, adding new circuits, or cutting holes for a brand new lighting layout, it is highly recommended to hire a licensed electrician to ensure everything meets local building codes.
2. Can I replace my old fluorescent tubes with LED panels?
Absolutely. Replacing old fluorescent troffers with LED panel lights (like the Ankur Eco LED Panel) is a very common upgrade. LEDs eliminate the flickering and buzzing associated with fluorescents, offer a much cleaner look, and last significantly longer. You just need to ensure the dimensions match or adjust your ceiling grid accordingly.
3. What does "Cutout Diameter" mean when buying recessed LEDs?
The cutout diameter refers to the exact size of the hole required in your ceiling to fit the recessed light housing. It is smaller than the outer trim of the light. Always measure the existing hole in your ceiling before purchasing replacements to ensure a snug fit.
4. Why are my new LED lights flickering?
Flickering LEDs are usually caused by an incompatible dimmer switch. Old dimmer switches were designed for the high wattage of incandescent bulbs and cannot handle the low wattage of LEDs. Upgrading your wall switch to an LED-specific trailing-edge dimmer will usually solve this issue instantly. Loose wiring connections can also cause flickering, so always double-check your wire nuts.
5. Are LED strip lights safe to leave on all night?
Yes. High-quality LED strip lights emit very little heat and are extremely energy efficient. They are perfectly safe to leave on overnight, making them an excellent choice for subtle nightlights in hallways, bathrooms, or under kitchen cabinets.
6. How long will my Ankur LED lights last?
High-quality LED fixtures, especially those featuring robust aluminum heat dissipation like Ankur Lighting products, are designed to last anywhere from 25,000 to over 50,000 hours of continuous use. Under normal household usage (around 4-6 hours a day), this translates to a lifespan of 15 to 20 years or more before they need replacing!
Read more

How to Maintain LED Lights for a Longer Lifespan
A Practical Guide to Keeping Your LED Lighting Bright, Efficient, and Long-Lasting Lighting has evolved dramatically over the past decade. Traditional incandescent bulbs are gradually being repl...
Read more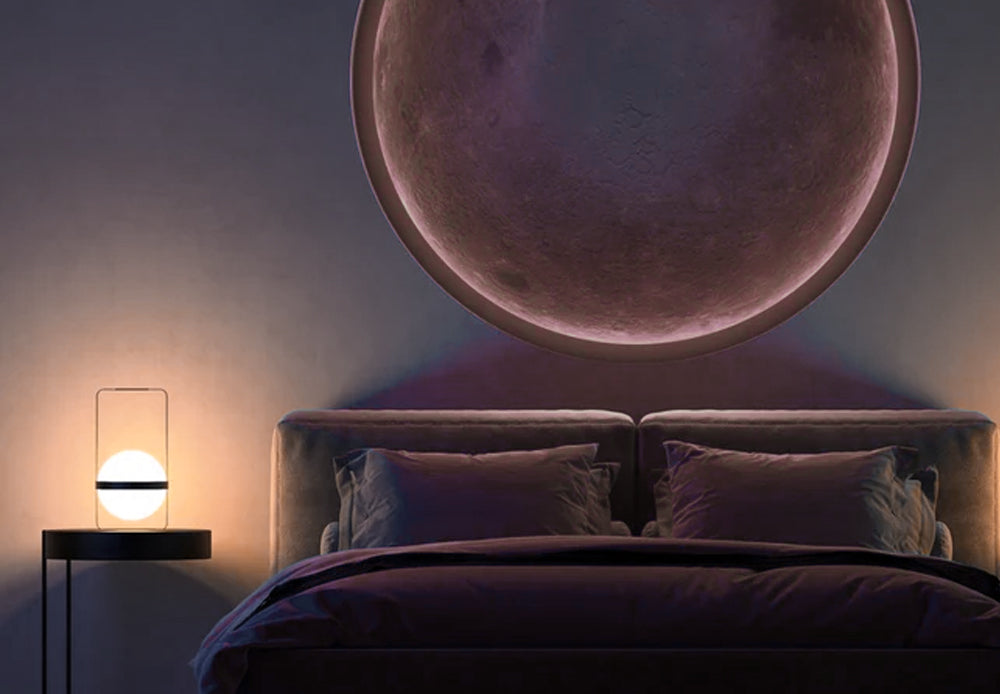
Illuminating Your Space: Top Features to Look for in LED Lights
Lighting is no longer just a functional necessity; it is a foundational element of interior design, mood regulation, and energy efficiency. If you are planning a home renovation, upgrading your com...
Read more
